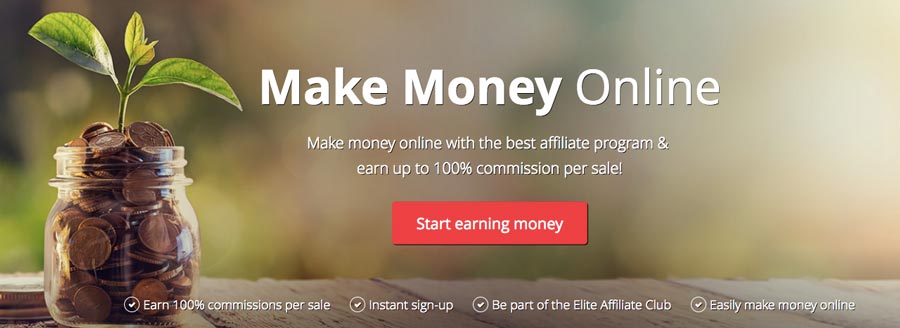
One of the longest-running ways to make money online is through your own website. You pick a niche, generate traffic, and then sell that traffic your products and services.
With your own website, you’ll have a lot of freedom with how you can turn a profit.
Below you’ll learn things like, how to make money with affiliate products, selling your own physical goods, courses, and a lot more.
Keep reading to learn 10 different ways your website can help make you money.
But, before you start building your first profitable site you’ll need a place to host it. Here at Hostinger, we have plans perfect for those just getting started online.
1. Make Money With an Awesome Blog
A lot of people start a blog as a way to express their views or as a creative outlet.
Not every blogger will hit these figures, but if you take the right approach you have a solid chance of earning money with your blog.
With a blog, it’s important to have a long-term vision. You won’t make money right away. But, as your writing improves, your skills grow, and your site picks up more traffic, it’s a definite possibility.
If your goal is to start a blog that makes you money, here are some tips to keep in mind:
- Choose an evergreen topic like health, finance, relationships, hobbies, or personal growth;
- Always aim to try and create the best resource on any given topic;
- Learn about SEO and ranking your site in the search engines;
- Network with popular bloggers and other influencers in your space.
The above tips will help you get going in the right direction. Once you have an authoritative blog that gets a large volume of traffic you’ll have many opportunities to monetize your site like:
- Paid advertising;
- Selling your own courses and products;
- Selling affiliate products;
- And much more!
Most of the methods of making money from a website can all apply to a popular blog you’ve created.
2. Start An Affiliate Website
Promoting products can be a great way to earn revenue. You can even start doing it here on Hostinger by
becoming an affiliate!
An affiliate site is built upon recommending or reviewing certain products. Then, when a reader buys that product through your link, you’ll receive a commission.
Although it might not seem like a big revenue generator, there are multi-million dollar sites based on affiliate revenue alone. For example,
Pat Flynn of Smart Passive Income generates a large chunk of his monthly income through affiliate marketing.
When creating an affiliate site you can base your revenue on recommending and reviewing products. Or, you can integrate affiliate marketing into an existing blog by showcasing resources you recommend.
For example, let’s say you have a site that’s dedicated to helping lose stubborn belly fat. You could create posts that review relevant products and supplements, and every time you mention the product, include an affiliate link.
3. Build an eCommerce Website
eCommerce sites have been exploding in popularity in recent years. With the prevalence of platforms like WordPress and WooCommerce, creating an eCommerce site couldn’t be easier.
If you prefer dealing with physical products and selling something tangible, then opening up an eCommerce store could be a great fit.
There are two different methods of running a successful online store:
- Creating and selling a niche physical product to a dedicated group of buyers.
- Purchasing cheaper goods manufactured in foreign countries, repackaging them, and selling them at a markup.
The first approach can be very successful, but it does require a passion for the product and the willingness to do a ton of research, product development, and testing.
If the first approach seems a little risky for your first online business, then you might consider the second option of reselling popular overseas products. This method involves sourcing a popular product from a platform like
AliExpress, repacking the product, and selling it through your own storefront.
Beyond selling the right products you’ll also need to think about how you’re going to ship your products. You can personally handle shipping and order fulfillment yourself. Or, you can employ
a popular method called drop shipping, where the manufacturer handles it for you.
4. Resell Web Hosting
Reseller hosting is another great way to make money online. In fact, we offer this service on our sister project
Hosting24.
The basic idea of reseller hosting is providing a dedicated server space, which you can use to build your very own web hosting brand. It allows you to:
- Create cPanel-powered web hosting accounts;
- Set custom resource limits (disk space, bandwidth, and similar);
- Conveniently manage all accounts using WHM.
Since cPanel is the best known tool to manage a hosting account, it will be easy to attract new users. The server uptime is also monitored by an in-house administrator team, which ensures good uptime and availability.
Last but not least, a dedicated 24/7 support staff will be there to help with all your questions and queries.
The following perks will let you focus on user acquisition, rather than the technical aspects of server management.
If you’re familiar with how web hosting works, reselling it will be a walk in the park. Who knows, you may become one of the web hosting giants if you put enough effort!
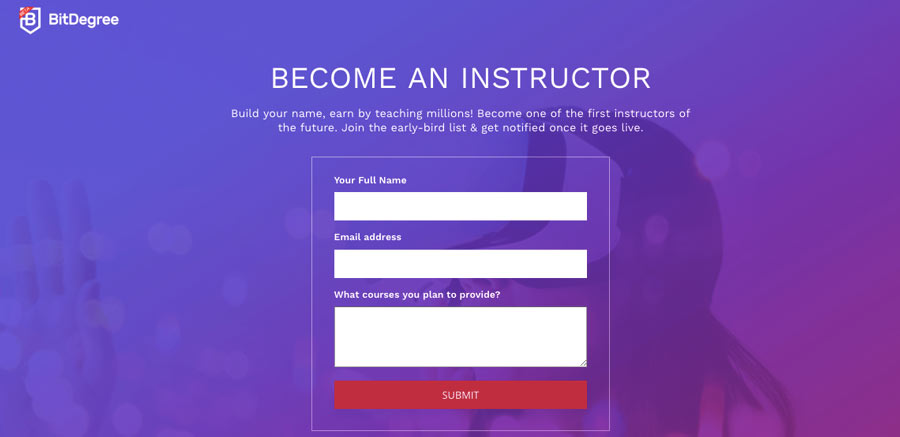
5. Create a Digital Course
It seems like digital courses are everywhere today! So, if you have valuable knowledge that someone would pay for, this could be a great option.
In addition to having your own courses, learning platforms such as BitDegree offer a chance to
become an instructor. It’s a unique opportunity to pass your skills and experience to thousands of people eager to learn about new technologies.
Digital courses can be produced in a lot of different formats, from simple PDF downloads, all the way up to self-produced video courses that have dozens of hours of content.
Creating online courses can be very powerful path. Since it’s under your control, there’s no limit to how much money you can make.
Like most other methods on this list, digital courses can be integrated into most styles of websites including blogs, eCommerce sites, and even affiliate sites.
If you’re looking to create a digital course, but haven’t settled on your topic it’s a good idea to poll your audience. Often, they can tell you exactly what they’d like to learn and would be willing to pay for.
For example, the online course
Learn Scrivener Fast is completely dedicated to helping writers learn the ins and outs of the software Scrivener. The creator of this course, Joseph Michael, uncovered the need by reading the comments on Michael Hyatt’s blog. And it has since grown into a six-figure business!
6. Create a Membership Site
Membership sites have exploded in popularity recently. The idea is easy enough to implement. But, it does require having an existing audience of some sort.
For example,
Mark Manson runs a popular self-development blog. On his site, there’s a membership portion that gives users access to online courses, videos, and additional article commentary. For fans of his work, it’s a great deal.
People are already visiting your website because they like what you write about and how you write it. So, you create a membership part of your site that has premium content that sits behind a paywall.
Now, every single person who visits your site won’t take you up on the offer, but your dedicated fans will find it irresistible.
The type of membership site you create will depend upon the kind of site you run and the level of depth you want to go with your premium content. If you like the idea, check out our guide on how to create a membership website using WordPress.
7. Sell Advertising Space
We’ve all seen sites that use advertising throughout their content. Sometimes the ads are intrusive, but other times they integrate naturally with the content.
Monetizing your site via advertising is usually reserved for when your site is receiving a large volume of traffic. But, if your traffic numbers are high and only continue to grow, then this option could be worth exploring.
The amount you’ll get paid will depend upon the network, but usually, you’ll get paid based upon the number of impressions or clicks.
There are many different ad networks to choose from.
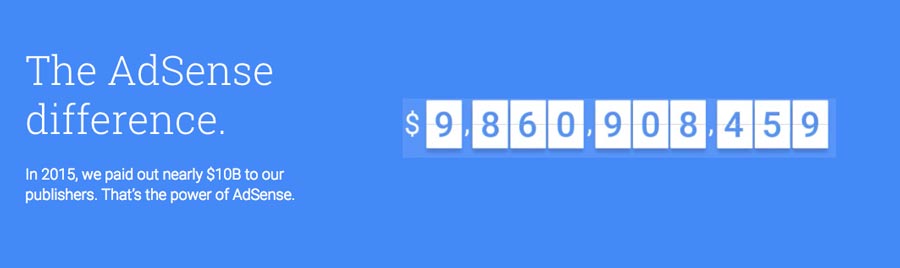
Google Adsense is probably the network you’re most familiar with. With Google AdSense, you apply to the network, and once you’re approved you can start adding ads to your site. Typically, the payout for Adsense ads won’t be great unless your traffic is in the millions of visitors per month.
There are other ad networks like
Ezoic and
Media.net. Both of which have an approval process and site evaluation. These networks also have the benefit of working with you to optimize your advertising revenue.
If you don’t want to work with an ad network you also have the ability to sell advertising yourself. If you have a niche audience, this can be a pretty lucrative option. Let’s say you have a site dedicated to sleep optimization. Instead of using one of the ad networks above you could sell ad space to large mattress companies.
You also have one final option of creating sponsored content. This is where a company will pay you to create sponsored content and you post the content on your site. Sites like
Buzzfeed and
Millo have taken this approach.
8. Sell Your Services
Selling services from your website is one of the fastest ways to make a profit.
There are two different approaches to selling your services:
Create an Educational Blog and Offer Your Services
Create a niche blog that contains useful information about a certain topic. Let’s say you have a blog about holistic wellness, and you’ve built a decent sized email list, or get solid traffic numbers.
You can add a services page to your site where you offer health coaching, whether in person or through mediums like Skype.
Create a Basic Website and Pitch Your Services
The other method involves creating a website for the sole purpose of pitching your services to companies and individuals.
Let’s say you want to be a freelance writer.
You choose a niche and build your website. Then, you create a few pages telling people who you are, the services you provide and showcase a few samples of your work.
Then, you start generating leads for your new service business by doing things like guest blogging, podcast interviews, or cold outreach.
If you’re looking to take your service-based business to new heights, then combining the two methods will give you great results.
9. Create a Subscription Job Board
Job boards can be a pretty lucrative way to earn a living with your website.
The process is simple. People looking to hire someone in a specific niche will post a job listing on your site and your visitors will apply for the job.
You can either charge people to post job listings. Or, you could charge your visitors a monthly membership fee to access the job board.
Keep in mind that you do need to have decent traffic in order for this to work. A company won’t pay to post a job on your site if you aren’t sending any qualified applicants their way.
For example, let’s look at the
ProBlogger Job Board. Here companies and individuals will pay a fee to post a job listing on the site. Then, it’s entirely free for anyone to access and apply for the job. Since ProBlogger is an authority site with a large audience, businesses who post a job will get hundreds of applications for each listing.
When creating a job board make sure you have a solid audience that has a synergy with companies in your space.
10. Create An Online Directory
Online directories aren’t as popular as they used to be, but they can still be profitable.
They work in a similar fashion to the job board above. But, instead of people paying to post jobs, or get access to the job board, they’ll pay you a monthly fee for a directory listing.
If you have an authoritative site or get a lot of traffic, then these listings are pretty valuable.
Let’s say you run a site that’s dedicated to web development and design. You produce high-quality content and have a solid amount of authority. You could create a directory portion of your site where web developers and agencies can purchase a listing.
This will not only provide them with a solid authoritative backlink, but it could be a nice source of traffic for their business.
Usually, directories work by charging a monthly subscription fee to be listed. You could even charge a premium fee to let businesses list themselves at the top of the directory, getting even more eyeballs on their listing.
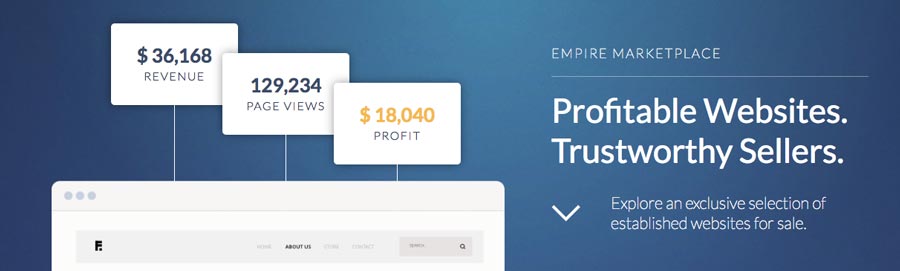
11. Sell Your Website
The final way to make money from your website is to sell it!
Depending on your site this can be a pretty lucrative option. Although it probably won’t make you wealthy, it can result in a pretty nice lump of cash.
On average your site will sell for a multiple of your monthly income. The multiple will depend on a variety of factors, but you can usually expect to sell for anything from a 12x to 30x multiple.


 http://img87.imageshack.us/img87/5862/image1an1.gif
 http://img110.imageshack.us/img110/6218/image2ie0.gif
 http://img98.imageshack.us/img98/9617/image3cr0.gif
 http://img134.imageshack.us/img134/633/image4hx4.gif
 http://img100.imageshack.us/img100/4658/image12du2.gif
 http://img145.imageshack.us/img145/7793/image14zg9.gif
 http://img264.imageshack.us/img264/7575/image16kn8.gif
 http://img139.imageshack.us/img139/83/image5oa7.gif
 http://img509.imageshack.us/img509/6449/image6fu0.gif
 http://img507.imageshack.us/img507/5774/image8wn8.gif